Nothing really sells that classic, jittery hand-drawn animation style like a boil…

Not like that. I’m talking about the kind that you get when a drawing is rendered imperfectly over and over again, frame-by-frame.
Modern-day software has practically eliminated this, which naturally made everyone want to recreate it. That’s why, much like putting an instagram filter over a 48 megapixel iPhone photo, we’re going to use our super-advanced computer to make our sleek animation look worse.
For style reasons.
But, before we dive in, I want to give credit to Ben Marriott for the original idea. He is the GOAT and deserves all the love. For this tutorial, I adapted his After Effects process and used it in Premiere Pro.
So, if you want to know how this Central Arkansas video editor gets that custom hand-drawn effect without ever leaving the timeline, keep reading.
Key Takeaways
Nest your layers: This saves you from copying and pasting effects across a bunch of different assets
Lower your frame rate: Smooth video looks too digital. Dropping your frame rate makes it look like old animation
Stack your effects: Using multiple layers of Turbulent Displace gives you the perfect imperfections.
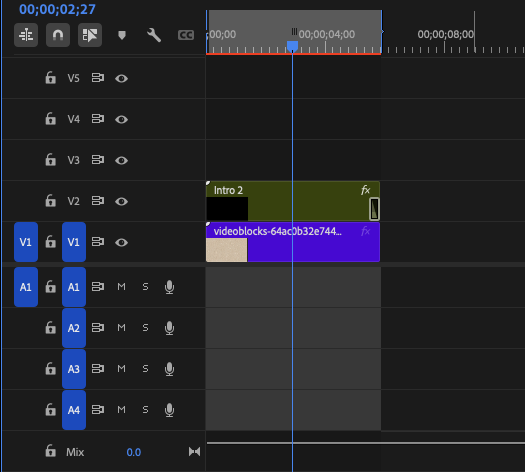
Step 1: Nest Your Animation
When you’re working with an animation that has a ton of different, moving pieces, you don’t want to have to copy a billion effects across a billion layers. I just go ahead and nest everything beforehand, so I only have to do this once.
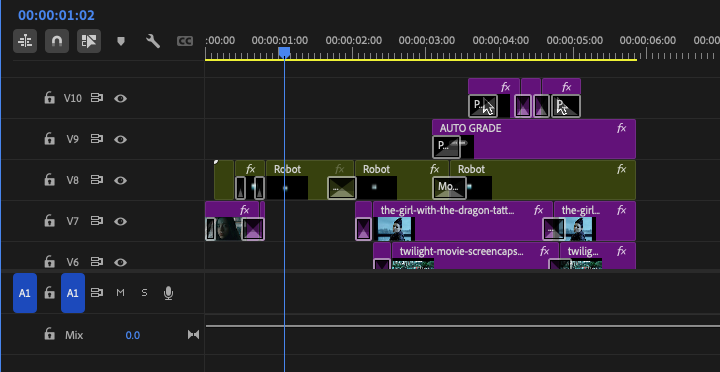
Step 2: Drop the Frame Rate
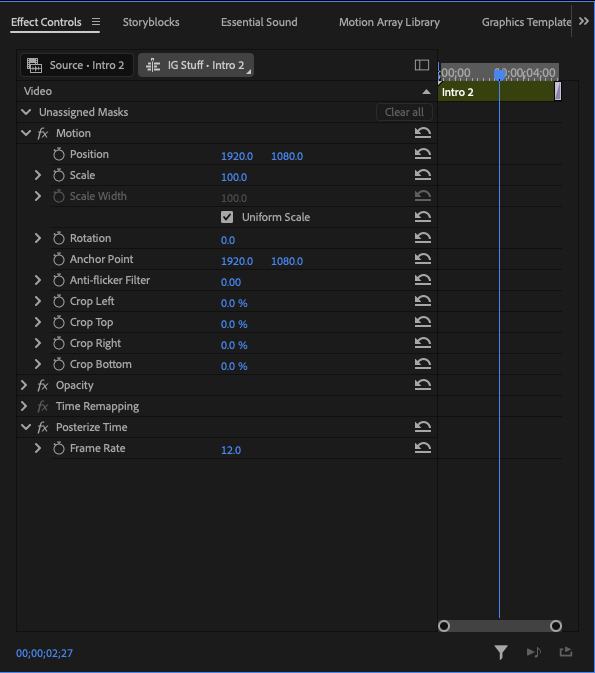
Standard video is usually animated at 24 or 30 frames per second, which is way too smooth. We need to chop it up a little bit.
Drop a Posterize Time effect on your nested sequence, then crank it waaaaay down to 12. This does a lot of heavy lifting for the hand-drawn feel and editors with lower-end rigs can probably just call it here.
But I’m not an editor with a lower-end rig. I’ve made a lot of bad decisions in my life and gear acquisition is all of them.
Step 3: Add the Imperfections
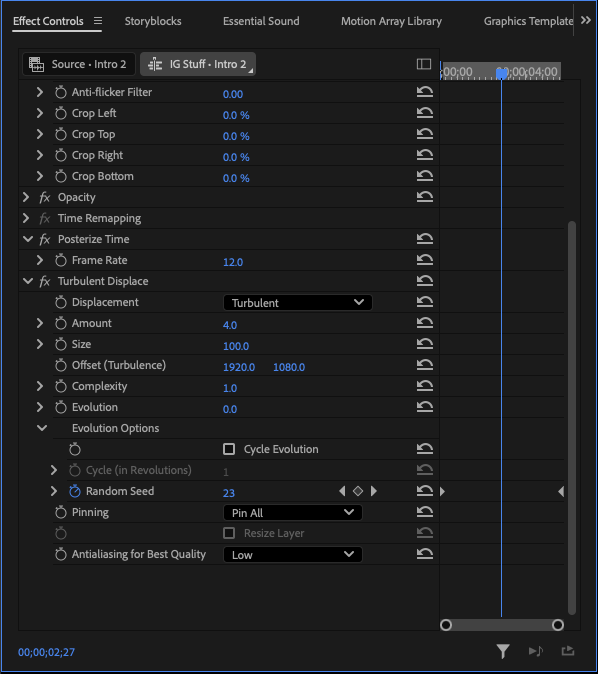
Real hand-drawn animation has natural variations and wiggles every time the artist redraws the frame. To replicate this, we are going to use the Turbulent Displace effect.
Right out of the box, it’s going to seem like you’re watching your videos with drunk goggles on. Let’s fix that.
Here’s the adjustments you should make:
Change the Amount to 4
Open Evolution Options
Keyframe Random Seed at the layer In and Out point
You can adjust the Random Seed to your liking. This is just to help us get that wiggle.
Step 4: The “Big” Boil
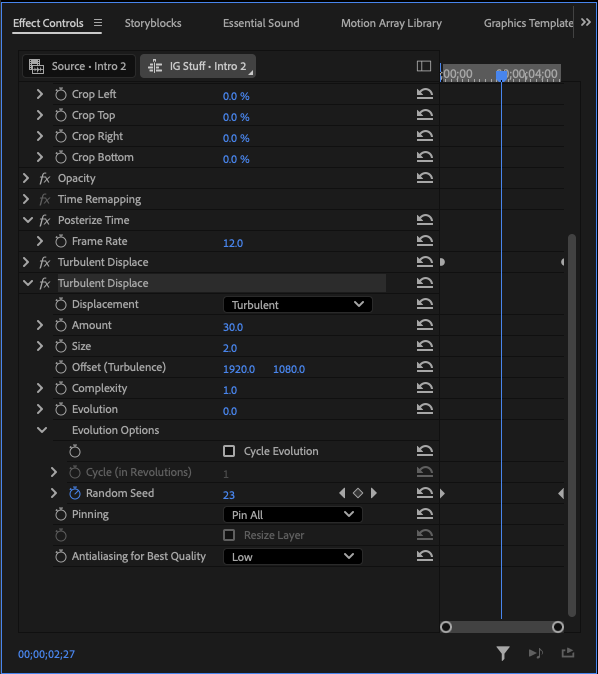
No little boil is complete without a big boil to back it up. We need to add one more layer of grit to really sell this effect.
Go ahead and duplicate the little boy and make some changes.
Here’s the adjustments you should make:
Change the Amount to 30
Change the Size to 2
Because we duplicated the original layer, there’s no need to adjust the Random Seed…
…unless you wanna, in which case I will not stop you.
The Wrap Up
And there you go! A fully customizable, hand-drawn style effect right on your timeline. But, why invent the wheel? If you’re a busy editor like I am, finding a way to template this kind of stuff is necessary.
That’s why I went ahead and did it for you. Go ahead and download my Hand-Drawn Effect preset here. ⬇️
At zeedubyah creative, our primary focus is delivering exceptional videos with efficient turnarounds. If you are a business or entrepreneur looking for professional video editing or motion graphics, let’s make something awesome together. Book a free, 30-minute discover call with no commitment required.